In this blog post, we’ll walk through creating a WebSocket server in Node.js using the ws library. We’ll maintain a queue of connected clients, notify users when new clients join or leave, and ensure every client stays up-to-date with the current lobby status.
All the code is available in my Git Repo
You’ll also need the ws library, which we will use to manage WebSocket connections.
Install ws using via following command:
npm install ws
Setting Up the WebSocket Server 🔗
We’ll begin by importing the ws library and creating a WebSocket server that listens on port 8080.
const WebSocket = require("ws");

const server = new WebSocket.Server({ port: 8080 });
let clientQueue = []; // Queue to store the names of connected clients

server.on("connection", (socket, request) => {
    let clientName = request.headers["name"] || "unknown client";

    // Add the new client to the queue and notify other clients
    clientQueue.push(clientName);
    console.log("New client connected:", clientName);

    server.clients.forEach((client) => {
        if (client !== socket && client.readyState === WebSocket.OPEN) {
            client.send(`${clientName} has joined the lobby`);
        }
    });

    // Check if the client is alone in the lobby
    const chatRoom = Array.from(server.clients).filter(client => client !== socket);
    if (chatRoom.length === 0) {
        socket.send("No one is in the lobby");
    }

    // Handle incoming messages from clients
    socket.on("message", (message) => {
        server.clients.forEach((client) => {
            if (client !== socket && client.readyState === WebSocket.OPEN) {
                client.send(`${clientName}: ${message}`);
            }
        });
    });

    // Remove the client from the queue on disconnect and notify other clients
    socket.on("close", () => {
        clientQueue = clientQueue.filter(name => name !== clientName);
        console.log(`${clientName} got disconnected`);

        server.clients.forEach((client) => {
            if (client.readyState === WebSocket.OPEN) {
                client.send(`${clientName} has left the lobby`);
            }
        });
    });
});

console.log('WebSocket server is running on ws://localhost:8080');
Creating the WebSocket Server 🔗
The server is created using:
const server = new WebSocket.Server({ port: 8080 });
This line initializes the server to listen for connections on port 8080. Unlike traditional HTTP servers, WebSocket URLs start with ws://, making the server accessible at ws://localhost:8080.
Handling Connections 🔗
Whenever a client connects to the server, we use the "connection" event:
server.on("connection", (socket, request) => {
    let clientName = request.headers["name"] || "unknown client";
    clientQueue.push(clientName);
    console.log("New client connected:", clientName);

    // Notify other clients that a new client has joined
    server.clients.forEach((client) => {
        if (client !== socket && client.readyState === WebSocket.OPEN) {
            client.send(`${clientName} has joined the lobby`);
        }
    });
});
Here, we extract the client’s name from the request headers and add it to our clientQueue. Then, we notify all other clients that a new client has joined.
Sending and Broadcasting Messages 🔗
The "message" event listens for messages from the connected client:
socket.on("message", (message) => {
    server.clients.forEach((client) => {
        if (client !== socket && client.readyState === WebSocket.OPEN) {
            client.send(`${clientName}: ${message}`);
        }
    });
});
This code ensures that every message sent by one client is broadcast to all other clients, enhancing the chatroom experience.
Handling Client Disconnections 🔗
When a client disconnects, the "close" event is triggered:
socket.on("close", () => {
    clientQueue = clientQueue.filter(name => name !== clientName);
    console.log(`${clientName} got disconnected`);

    server.clients.forEach((client) => {
        if (client.readyState === WebSocket.OPEN) {
            client.send(`${clientName} has left the lobby`);
        }
    });
});
The disconnecting client is removed from the clientQueue, and the remaining clients are notified that someone has left the chat.
Running the WebSocket Server 🔗
To run the server, save the script as server.js and run it using:
node server.js
The server will start listening on ws://localhost:8080, and you can connect multiple WebSocket clients to test the functionality.
Testing with Postman 🔗
We could use a web-based client to test our WebSocket server, but for this article, we will use Postman.
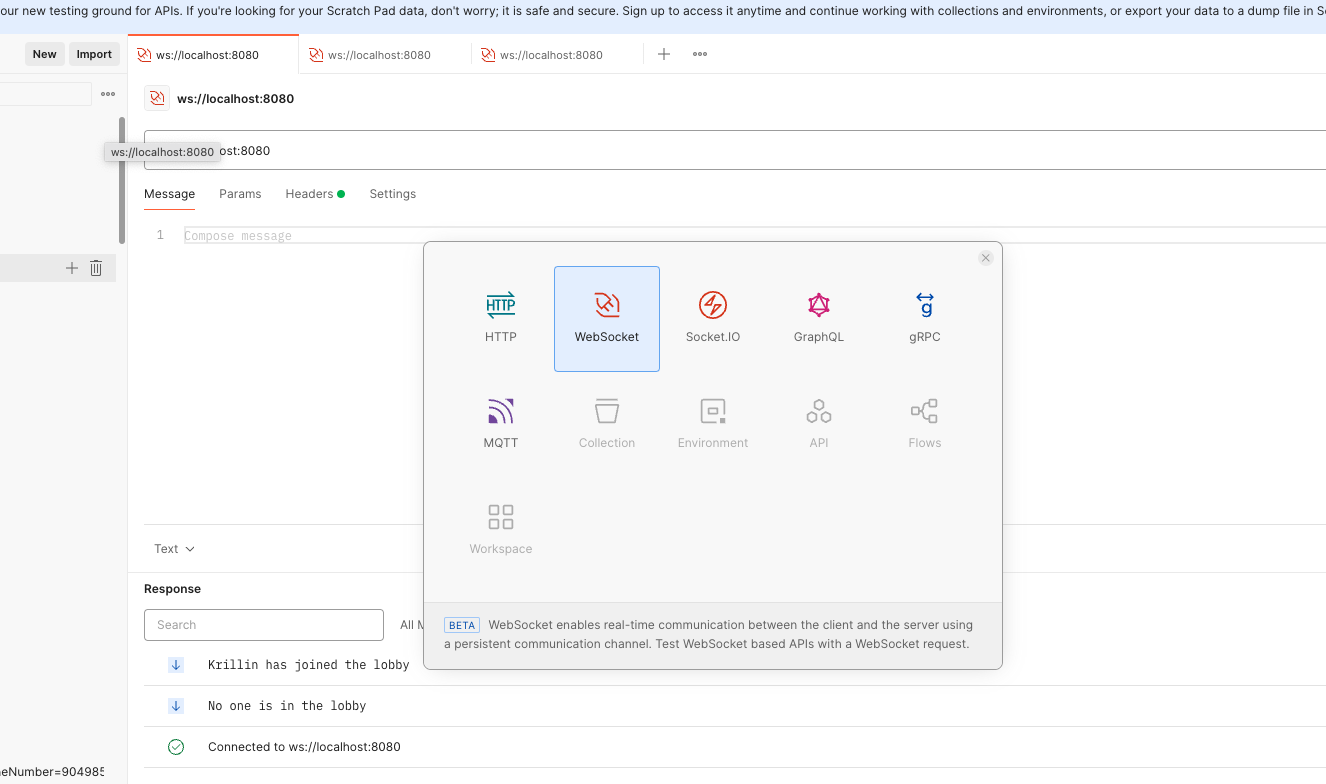
Open Postman, and select the WebSocket client to start a new request.

Open three WebSocket clients in Postman. Let’s call them:
- Goku
- Krillin
- Bulma
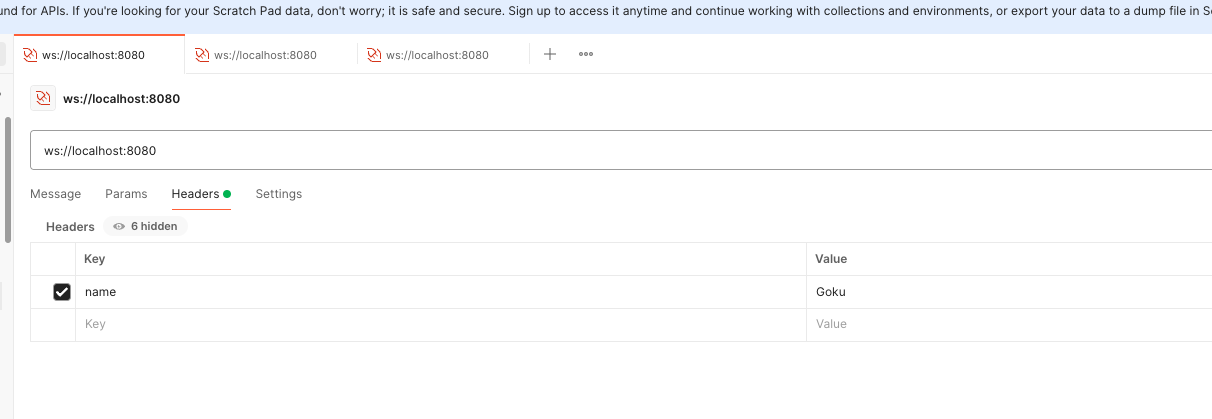
Start with Goku and provide the "name" parameter in the headers.

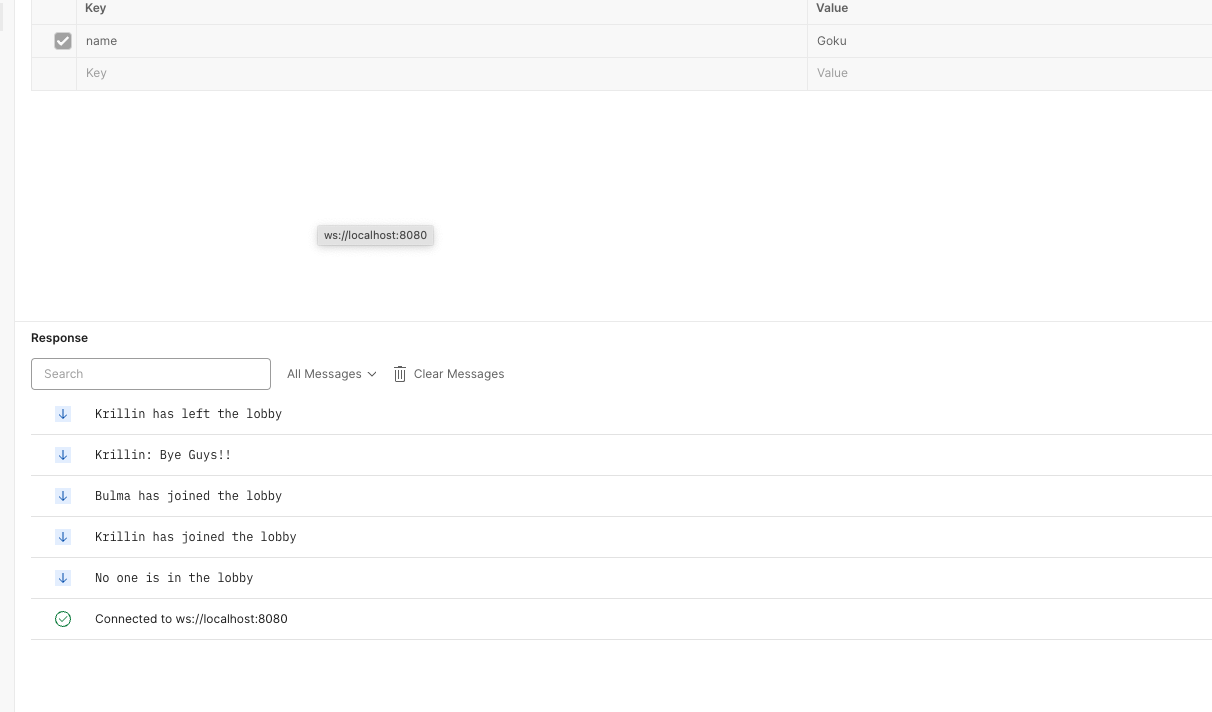
Click Connect, and notice that you receive a message saying, "No one is in the lobby." This happens because Goku is the first client to connect.
Next, do the same for Krillin and Bulma.
Check the logs for Goku, and you will see that Krillin and Bulma have joined the lobby.
Now, try sending a message from Krillin and then disconnecting. You will be able to see on both Goku’s and Bulma’s screens that:
- Krillin has sent a message.
- Krillin has disconnected from the lobby.

You can experiment further with this setup. Add more clients, add functionalities like kicking users out, or other new features. Use this as your playground to explore the potential of WebSocket applications.
Summary 🔗
In this blog post, we created a WebSocket server in Node.js using the ws library. We learned how to:
- Maintain a queue of connected clients.
- Broadcast messages when clients join or leave the chat lobby.
- Implement two-way real-time communication between the server and clients.